I have to say, Bone In Tenderloins are one of my favorite steaks to cut-especially Dry Aged. Dry Aged meat is special and the practice is old school. Before refrigeration, steers were usually slaughtered in the fall and the untrimmed sides were hung in caves or cellars; slightly humid with lower ambient temperatures. In the right environment, moisture evaporates from the beef leaving a more enhanced and distinct beef flavor. Aside from the the difference in flavor, the connective tissues in the meat begin to break down leaving a more tender cut.
Now that we are fortunate enough to have coolers and humidity systems to dial in the right environment, we can choose the exact cuts/primals we want to age. At the shop I work at, we age three different primals on a semi-regular basis: 107's / 3x3's, Shortloin's, and Top Butts.
107 and 3x3 are different ways you can order the rib primal. Each are cut to a different specifications at the slaughterhouse, but both result in Rib-eye roasts. This primal section starts at the Chuck and ends at the Shortloin.
The Shortloin is home to two major muscles and the makings of a third. The Striploin is a boneless NY Strip roast, whole and untrimmed. The Tenderloin is the most tender muscle on the steer, both raw and cooked. The third muscle on this primal starts out as a small oval on a Porterhouse-side NY Strip and actually turns into the Top Butt / Top Sirloin.
Lastly, the Top Butt. Once cut, these are called Top Sirloins - the last of the luxury cuts. I consider a Top Sirloin to be the workingman's steak. A nice-sized Top Sirloin will easily be two pounds, able to feed 3-4 people.
 |
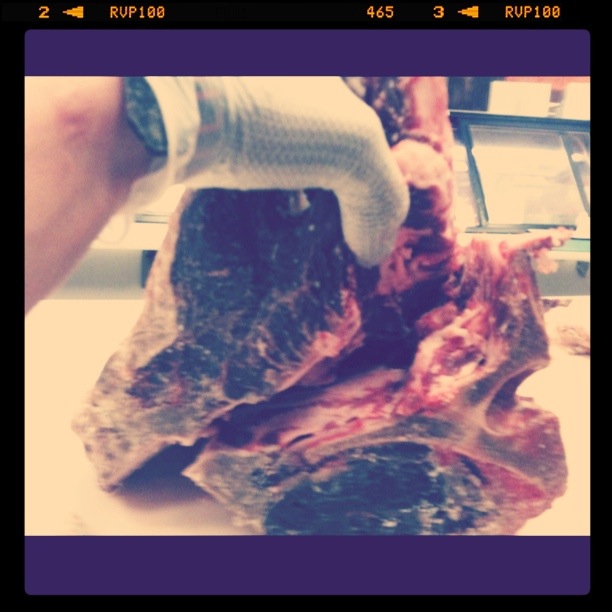
| This is a Shortloin. This one had been aged for 14 days. |
 |
| Any time I'm going to cut into an aged primal, I trim away some of the bulk fat to clean the piece up. |
 |
This is the top side of the piece, NY on top, Tenderloin on bottom. There are a few ways to do this
step, but in essence, the goal is to make a clean cut against the bone to begin to free the Striploin from the Bone In Tenderloin. |
 |
It is a priority to get as close to the bone as possible, leaving all the meat intact, but boning out beef is notoriously hard
on an knife's edge so I wont use my sharpest knife for a few of these steps. |
 |
| Usually while cutting one of these, I'll stand the primal up vertically and cut down into the spine using the tip of my knife as a fulcrum. In a few revolutions, this step will be complete with less effort and stress on your hands. |
 |
Once you've made it all the way across the spine, you'll start working in and around the plate-bones and 'buttons'.
I'm going to go ahead and promise that if you ever cut one of these, your hands will hurt afterwards. You'll be doing a huge amount of pulling as well as fine, sturdy manipulation with your knife. |
 |
| Looks like I'm about two vertebrates in, at this point I am still using a 6" knife. Take baby steps with the bone structure closest to the spine, here is where you'll find the highest concentration of bone. The plates separating the Striploin and Tenderloin are fairly flat and require less knife-work. |
 |
| Once I have most of the spine-work down, I'll use my 8" Breaking knife to take deeper cuts to free the meat from the plates. |
 |
| Though you can't see it clearly in this picture, most of the meat can now be considered boneless. Approximately 3/4 the the Striploin has been freed. |
 |
| Flip the primal over to remove the Tenderloin. While peeling the roast back, use the tip of your knife to separate the two roasts. |
 |
| On the left is an unfinished masterpiece, on the right is a Boneless Striploin. Once cut and trimmed, you should be able to get 12 decent NY Strips. |
 |
| Cadillac on the left, Limousine on the right. |
 |
| Chine the Tenderloin Roast as you would anything else. These steaks will be single-vertebrate steaks, after you chine these the steaks are cut by hand. There's no reason to take a Tenderloin and cut it with a saw unless you're cutting T-bones. |
 |
| Firm-up the Tenderloin and clear a path on the plates so that you can buzz them off without hitting any meat. |
 |
| Cut between the vertebrates to get 3 Large steaks and one fair-sized steak. In my opinion, this is the hardest cut to master and one of the more dangerous. Wear a cut-resistant glove and have fun! |


